So you’ve decided to try home brewing your own beer. You’ve bought your brewing equipment, and probably bought a beer ingredient kit. Everything looks quite straightforward. Except for the hydrometer.
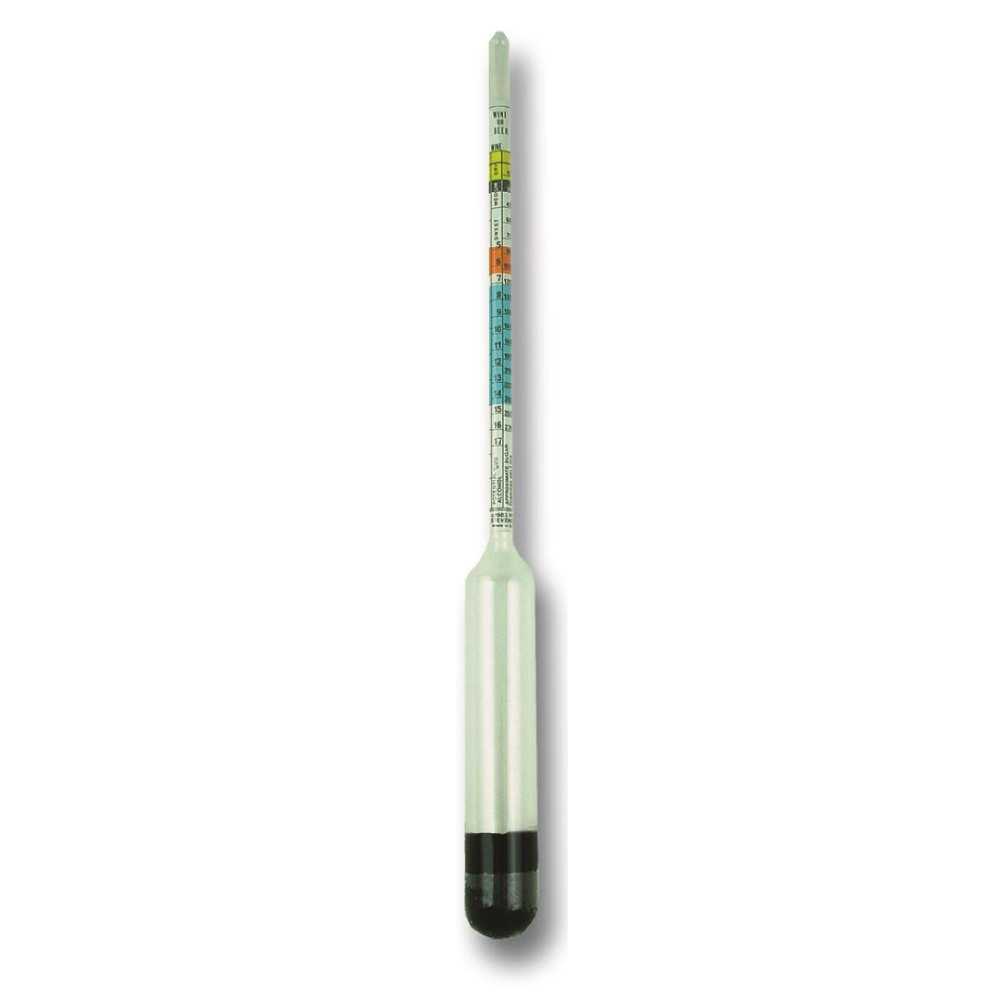
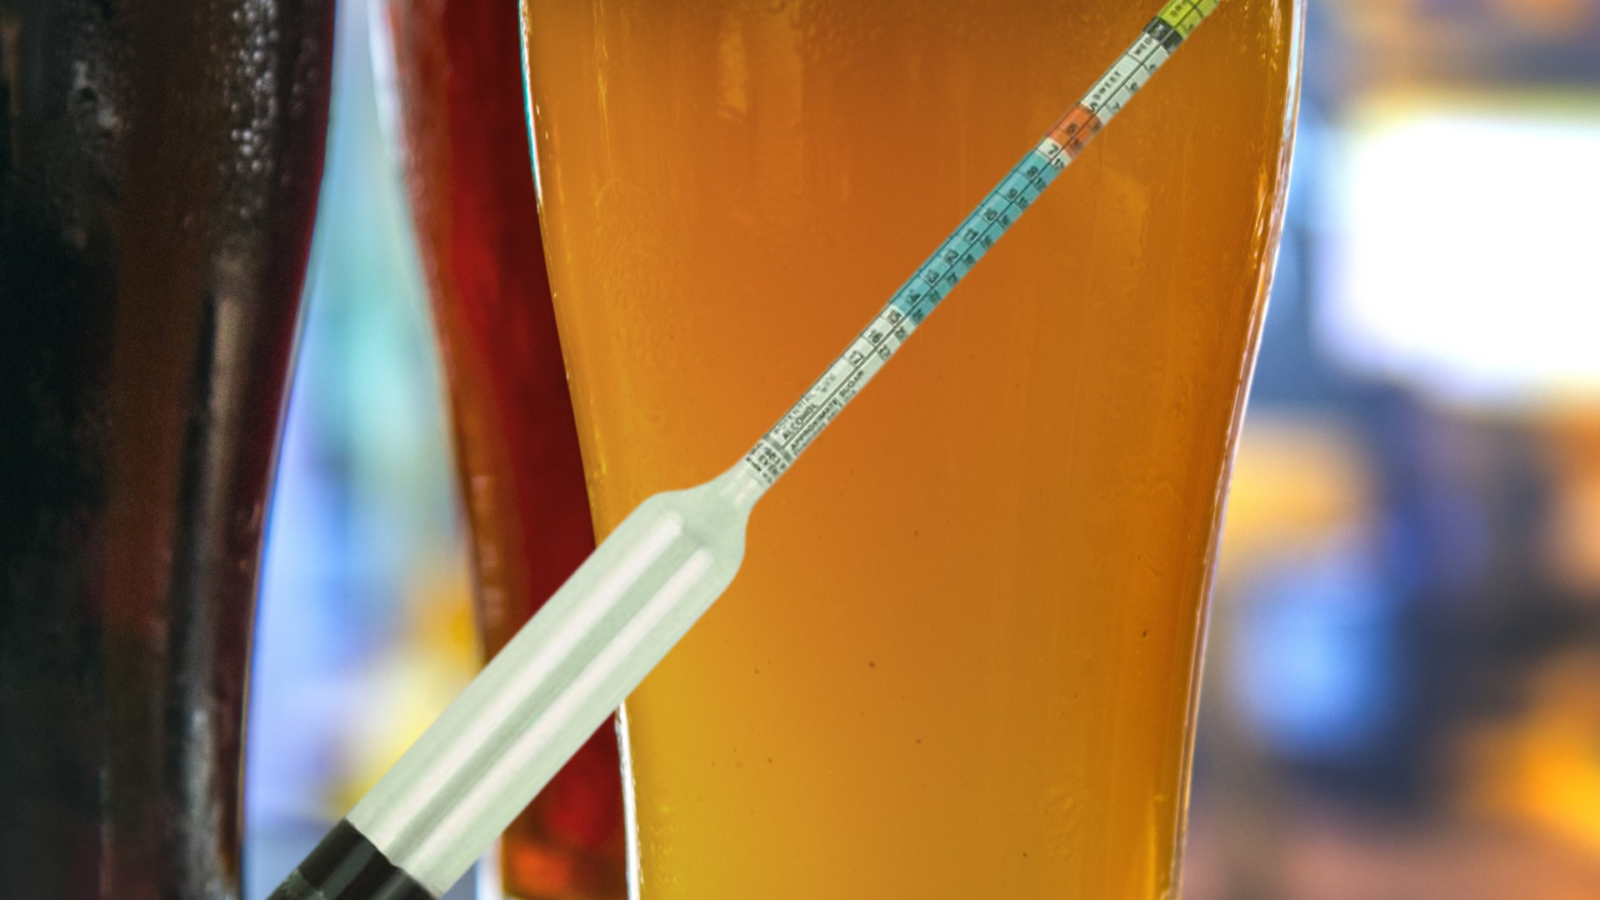
It’s like an oddly-weighted thermometer, and there are probably three scales on it, none of which look familiar.
If you’ve never used one before, you’re likely to be asking yourself “How DO you read a hydrometer?”
Fear not, I’m here to help!
So, what even IS a hydrometer?
This is going to sound a bit geeky, but it is an instrument to measure the specific gravity of a liquid.
And why should I care about specific gravity?
A fair question. When you are home brewing beer (or wine, cider or whatever’s your poison!), the fermentation process is basically the yeast chomping through the sugars, creating alcohol as one of the happy byproducts.
As the sugar is consumed by the yeast, the specific gravity will drop. Personally, I found it difficult to get my head around the idea of liquids having different weights. So instead it can be simpler to think of the gravity of a liquid meaning its thickness.
As the sugar is used up, the liquid slowly becomes thinner, as the thick sugars turn into thin alcohol.
When the liquid is thick or dense, more of the hydrometer will float, and as it becomes thinner, more of the hydrometer sinks below the surface.
Now, by comparing the Original Gravity (the reading before fermentation begins) with the Final Gravity (the reading after fermentation is complete) you can calculate how much the gravity has dropped.
And now you can use the drop in gravity points to work out the alcohol-by-volume in your homebrew.
What do the numbers on a hydrometer mean?
Depending on your hydrometer, there may be three different scales you can use. These are:
- Specific Gravity
- Potential Alcohol
- Brix Balling
Potential Alcohol by Volume scale
The simplest, and (for me?) least accurate is the Potential Alcohol by Volume scale. Take the start reading, before fermentation starts, and then take a second reading after fermentation is complete.
For example, you start with a potential alcohol by volume reading of 6%. After fermentation is finished, your second reading says 1%. By subtracting the final reading from the first, you get 6% minus 1% = 5% ABV.
Contrary to appearances, you can’t simply dip the hydrometer into a liquid and tell how much alcohol is in it, convenient though that would be!
Specific Gravity scale
This is what virtually all brewers use, and is also what tends to be used in beer recipes. Although it’s a little more complicated, I recommend taking the time the learn it. It’s really not that hard!
So, once upon a time, it was decreed that the specific gravity of water is 1.000
(This is not strictly true, because it will change at different temperatures and altitudes. In high and low temperatures and altitudes, you will want to compensate for any variations. But hold that thought for the moment…)
Anyway, as you dissolve sugars into water, the specific gravity will get higher. For instance, I am currently brewing a stout with a rather high Original Gravity of 1.078
As fermentation happens, the sugars will be converted into thinner alcohol, and in this instance, my target final gravity is 1.015
(Sometimes, to make calculations easier, these numbers may omit the decimal point, and so would be expressed as 1078 and 1015.)
Similar to the Potential Alcohol by Volume scale, we will subtract the final gravity (FG) from the original gravity (OG), as follows:
1.078 – 1.015 = 0.063
Finally, we multiply the difference between the original and the final gravity by 131.25
Which means if the specific gravity of my stout drops down as far as I hope, it will have a whopping strength of 8.3%
Yikes! This may be one of those brews that get me into trouble.

It is also possible to use a table to calculate this at a glance.
The below table is approximate but ought to give you accuracy to within 0.2 percent.
| OG | ||||||||||
| FG | 1.030 | 1.035 | 1.040 | 1.045 | 1.050 | 1.055 | 1.060 | 1.065 | 1.070 | 1.075 |
| 0.998 | 4.2% | 4.9% | 5.5% | 6.2% | 6.8% | 7.5% | 8.1% | 8.8% | 9.5% | 10.1% |
| 1.000 | 3.9% | 4.6% | 5.3% | 5.9% | 6.6% | 7.2% | 7.9% | 8.5% | 9.2% | 9.8% |
| 1.002 | 3.7% | 4.3% | 5.0% | 5.6% | 6.3% | 7.0% | 7.6% | 8.3% | 8.9% | 9.6% |
| 1.004 | 3.4% | 4.1% | 4.7% | 5.4% | 6.0% | 6.7% | 7.4% | 8.0% | 8.7% | 9.3% |
| 1.006 | 3.2% | 3.8% | 4.5% | 5.1% | 5.8% | 6.4% | 7.1% | 7.7% | 8.4% | 9.1% |
| 1.008 | 2.9% | 3.5% | 4.2% | 4.9% | 5.5% | 6.2% | 6.8% | 7.5% | 8.1% | 8.8% |
| 1.010 | 2.6% | 3.3% | 3.9% | 4.6% | 5.3% | 5.9% | 6.6% | 7.2% | 7.9% | 8.5% |
| 1.012 | 2.4% | 3.0% | 3.7% | 4.3% | 5.0% | 5.6% | 6.3% | 7.0% | 7.6% | 8.3% |
| 1.014 | 2.1% | 2.8% | 3.4% | 4.1% | 4.7% | 5.4% | 6.0% | 6.7% | 7.4% | 8.0% |
| 1.016 | 1.8% | 2.5% | 3.2% | 3.8% | 4.5% | 5.1% | 5.8% | 6.4% | 7.1% | 7.7% |
| 1.018 | 1.6% | 2.2% | 2.9% | 3.5% | 4.2% | 4.9% | 5.5% | 6.2% | 6.8% | 7.5% |
| 1.020 | 1.3% | 2.0% | 2.6% | 3.3% | 3.9% | 4.6% | 5.3% | 5.9% | 6.6% | 7.2% |
| 1.022 | 1.1% | 1.7% | 2.4% | 3.0% | 3.7% | 4.3% | 5.0% | 5.6% | 6.3% | 7.0% |
| 1.024 | 0.8% | 1.4% | 2.1% | 2.8% | 3.4% | 4.1% | 4.7% | 5.4% | 6.0% | 6.7% |
| OG = Original Gravity; FG = Final Gravity |
You can print this out for convenience here.
Or, use this calculator:
Temperatures also have an effect on the readings, as I will explain a bit later…
The Brix scale
In fairness, you probably don’t really need to ever use this.
But in case you’re curious, it measures the percentage (by weight) of sugar that is in the liquid. A good explanation is given here.
Vineyards and wineries use this scale; again it can help you work out the potential alcohol by volume, or how much sugar a grape harvest is able to yield. It apparently appears in the more advanced winemaking books. Personally, I haven’t made use of this scale so far in my homebrewing experience.
Anything else I need to know about reading a hydrometer?
ABV calculations using a hydrometer are near enough at normal beer strengths. It is worth bearing in mind that as you get into to region of extremely low-alcohol, or extremely strong beers, you will sacrifice some accuracy.
In the interest of best practice, I ought to explain that the best way to take a hydrometer reading is from a sample of the liquid in a separate container.
This is to avoid contamination or oxidisation of your beer. You can remove a sample from your fermentation vessel with a (sanitised) wine thief or a large syringe, and transfer it into a tall thin jar. This is apparently what the plastic case your hydrometer comes in is for, a fact I only recently found out.
It also allows you to read the hydrometer more correctly.
You should take your reading from the bottom of the meniscus (the curve you get at the surface of liquids), not the top. This is clearly not possible without transferring into a separate, narrower container, and viewing side-on.
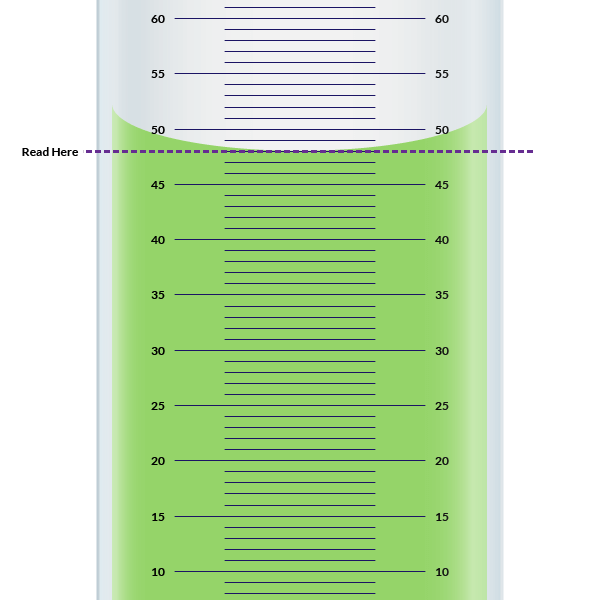
Nonetheless, I personally just plonk the hydrometer (sanitised, obviously) straight into the middle of the fermentation vessel. I know it’s naughty and lazy, but I haven’t had any problems doing so, so far.
Anyway, that’s all there is to it. I hope I’ve cleared up what a hydrometer is, how it works, and how you read a hydrometer.
How do you read a hydrometer at different temperatures and altitudes?
This is a bit more advanced.
Okay, so your normal hydrometer is calibrated so that water has a specific gravity of 1.000 at 15°c, at sea level.
The effect of temperature changes on hydrometer readings
As the temperature of a liquid rises or falls from 15°c, so you should do a correction of the reading.
This stands to reason – as liquids become warmer, they tend to become thinner, and as they become colder, they become thicker.
Think of honey, or if you prefer, Marmite.
So your basic water is:
- 0.994 at 10°c
- 1.000 at 15°c
- 1.0009 at 20°c
For your purposes and mine, that’s enough to make a slight difference to your estimate of alcohol content. If this bothers you, you can add or subtract from your original and final gravity readings.
Since I’m not too bothered, I don’t do this. I figure that if I’m brewing an ale, as I usually do, both the original and final gravity would be calculated at around 20°c, so the inaccuracies will balance each other out.
But, if accuracy is your bag, for every 5°c above 15, you’ll need to add around 0.002 gravity points.
Or you could just cool the liquid…
The effect of higher and lower altitudes on hydrometer readings
I’m reasonably sure this won’t affect your brewing much at all.
But as I understand it, air gets thinner or less dense, as altitude increases.
Apparently, as the air pressure decreases, so does the density of liquid.
However, since the change in the density of the air will be affecting the liquid and also the hydrometer you’re using to measure the liquid’s density, then it probably balances out. I’m not certain about this, but if you’re at a high altitude you can check if I’m right by popping your hydrometer into water at 15°c, and see if the SG is 1.000
A bigger problem for high altitude home brewers is that at higher altitudes, the thinner air means that water boils at a lower temperature. This means that if you are boiling hops, you may need to use more to get the same level of bitterness.
Also, shortly I’ll be writing a post on how to calibrate your hydrometer and thermometer. Why would you want to do this? Because these two items give you some extremely useful information, so you want to know that they’re right, don’t you?
If this post helped, why not let me know in the comments, or share this post?

